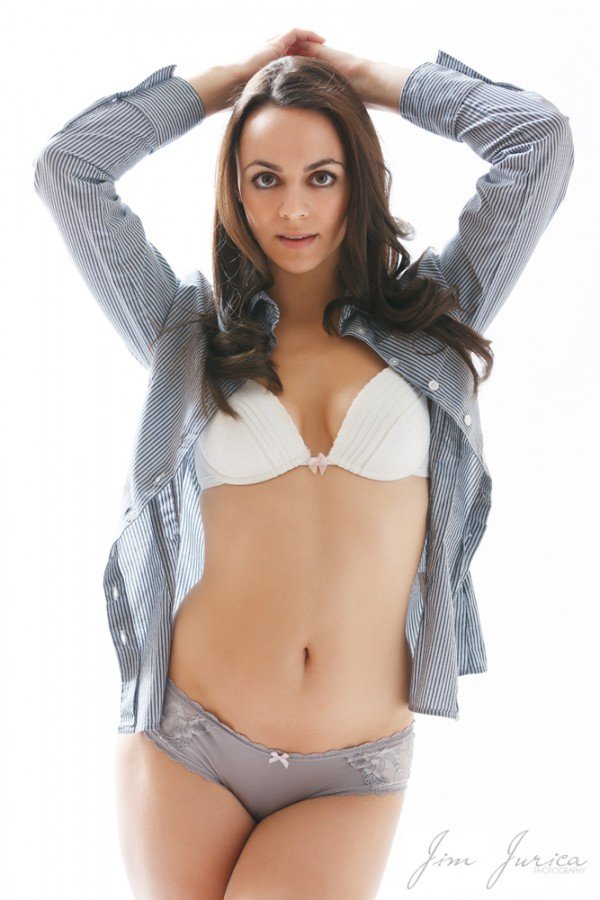
White backdrops get a bad rap for being boring. Or have the stigma as being the hallmark of amateurs who are limited to working in garages and basement studios.
Sure, it’s easy for any new photographer to point a light (or two, or three) at a model on a white background and walk away with decent results. But after the first few dozen shoots, the trick becomes taking it one step further and turning that sea of white into something a little more interesting and artistic.
When I teach studio workshops, I drill this into my attendee’s heads: if you can master a white paper backdrop, you can do anything with lighting. And I want to kick off my very first lighting tutorial for Glamour Models Magazine by jumping in head first and breaking a few rules of convention. That starts by showing you how to work in a way that may seem counter-intuitive: shooting with NO lights at all pointing at your model.
Keep this in mind: white paper offers the mixed blessing of being highly reflective and… highly reflective. That makes things easy in a lot of ways, bouncing light well and doing a great job of filling in potentially nasty shadows. So well in fact, that many photographers over-think their approach to white backgrounds and use more lights than are really needed. That highly reflective nature also makes it difficult to create flattering shadows and some kinds of high-contrast looks. So…
What if we embrace the reflective powers of white paper, and set up one (and only one) studio light in the “wrong” place: behind the model. This is more formally known as back lighting or even wrap-around light.
Looking at the lighting diagram above, you can see there are no lights at all pointing towards our subject, and that should rub your photographic instincts the wrong way. Yet the result is a very dramatic, bright look created with minimal equipment and maybe two minutes of set up time.
For the model image in this article, I used nothing fancy at all: a single Alien Bee flash fitted with the 7 inch reflector that is standard with every unit. That’s it, no other equipment. I had this about 8 feet above the floor and pointing towards the backdrop and white ceiling. Light coming from behind just bounces everywhere and fills in shadows on her face.
How far you place the model away from the backdrop greatly influences contrast in the images, so be sure to grab a few test shots while having your model step forward and back to find the right placement. And check your camera display or review images on a monitor to make sure you’re getting it right. A few extra minutes of review time can save you hours in Photoshop later.
Back lighting like this in the studio is really no different than shooting outdoors and putting the sun behind your model’s back. In both scenarios, the look is influenced by what else is around to bounce light back at your subject. I had light tan walls and a white ceiling in the small space where the example image was shot. You might have a larger or darker space that isn’t as reflective, requiring the addition of a reflector to achieve the same result.
That’s all for now, and until next time… keep on clicking,
Jim Jurica
www.JimJuricaPhotography.com
Model: Jocelyn L


